

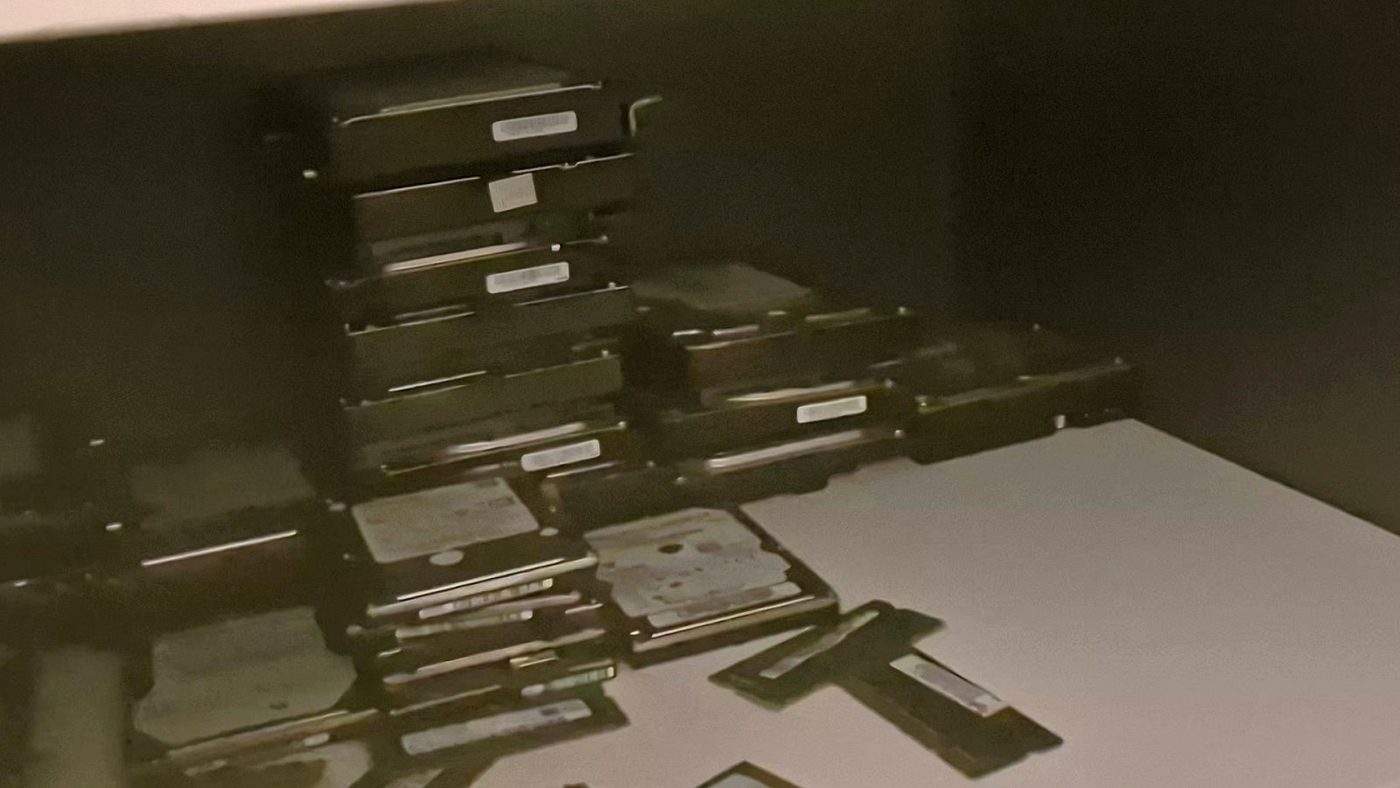
Got an old PC and a couple of spare hard drives? This guide turns them into your own network storage (a NAS). Your files, photos and movies stay in your house, not on Google Drive or OneDrive, and every computer on your home network can reach them.
It follows the Tech Tips With Adam video step by step, with screenshots from the actual build, so you can work through it at your own pace. Nothing new was bought. It's an old Dell OptiPlex and a couple of mechanical drives.
What you need
- An old PC. Nothing fancy. The video uses a Dell OptiPlex with an i7-3770 and 16 GB of RAM.
- A boot drive for TrueNAS itself. The video uses a 1 TB 2.5" HDD. TrueNAS takes over this whole drive.
- One or more storage drives for your files. The video uses a 3 TB HDD.
- A USB stick for the installer. Everything on it gets wiped.
- A network cable from the old PC to your router, plus a Windows PC on the same network.
01Download TrueNAS
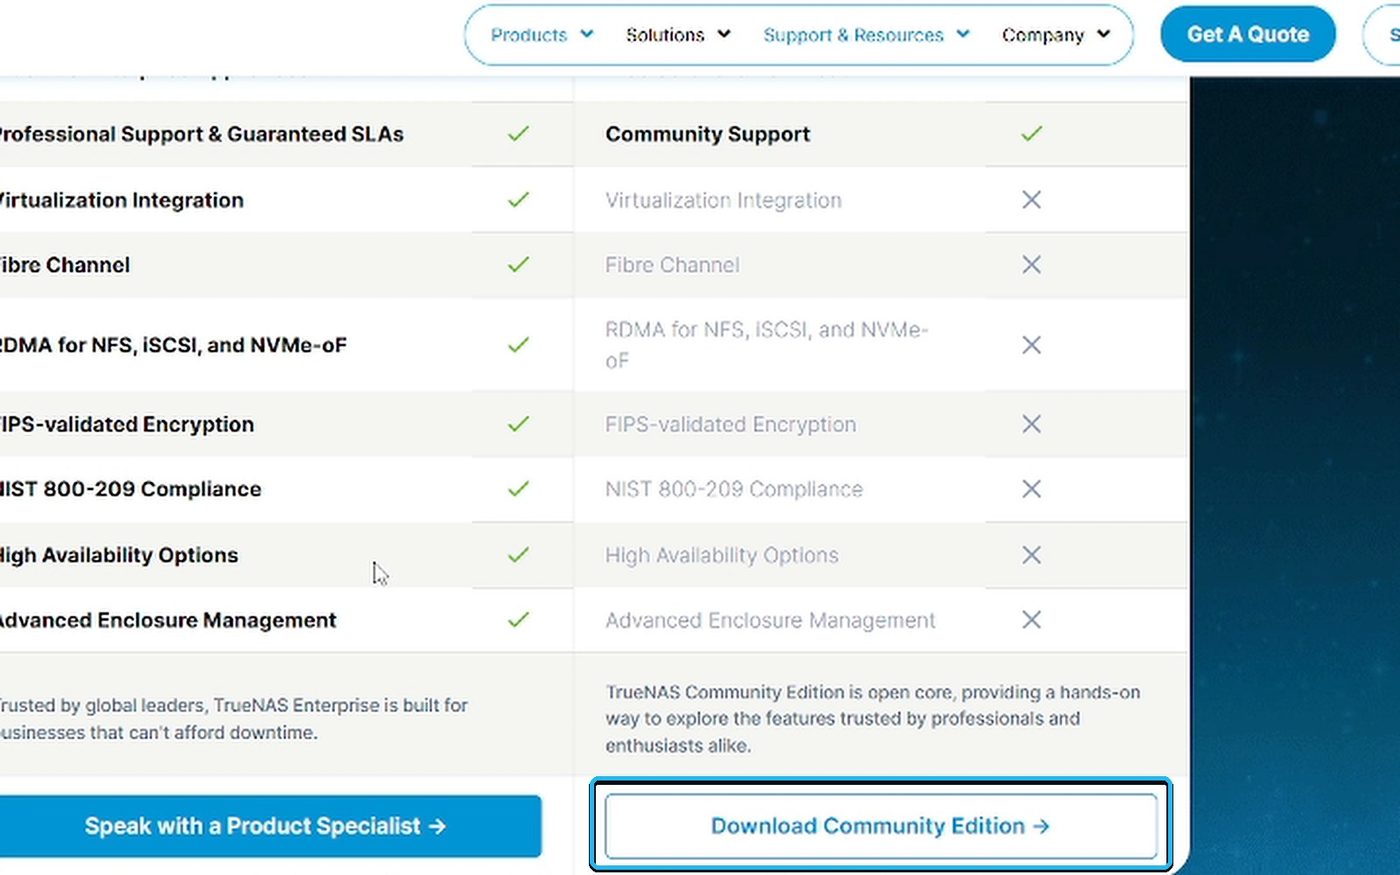
TrueNAS Community Edition is free and open source. On truenas.com, go to Support → TrueNAS Community Edition, scroll to the bottom and click Download Community Edition.
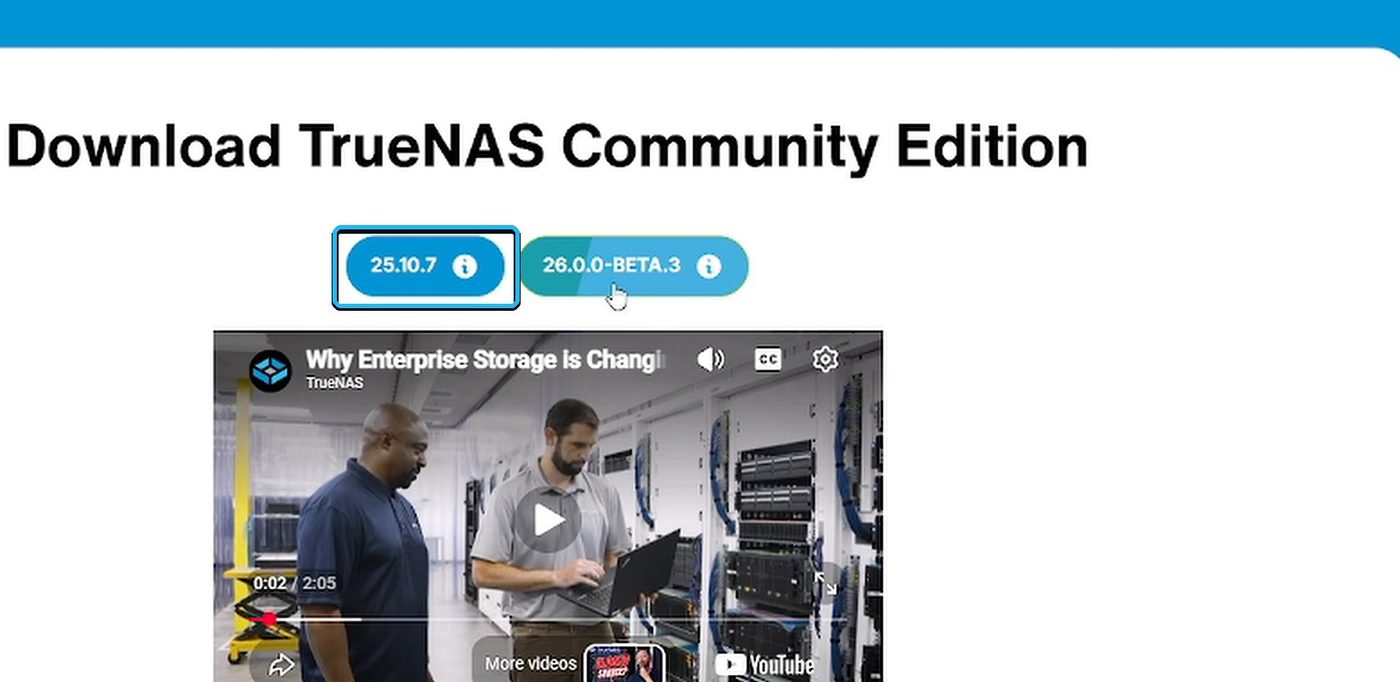
Pick the current stable version and save the .iso file somewhere easy to find, like your desktop.
02Make a bootable USB with Rufus
Rufus writes the installer onto your USB stick. Get it from rufus.ie. Either the portable or the installed version works.
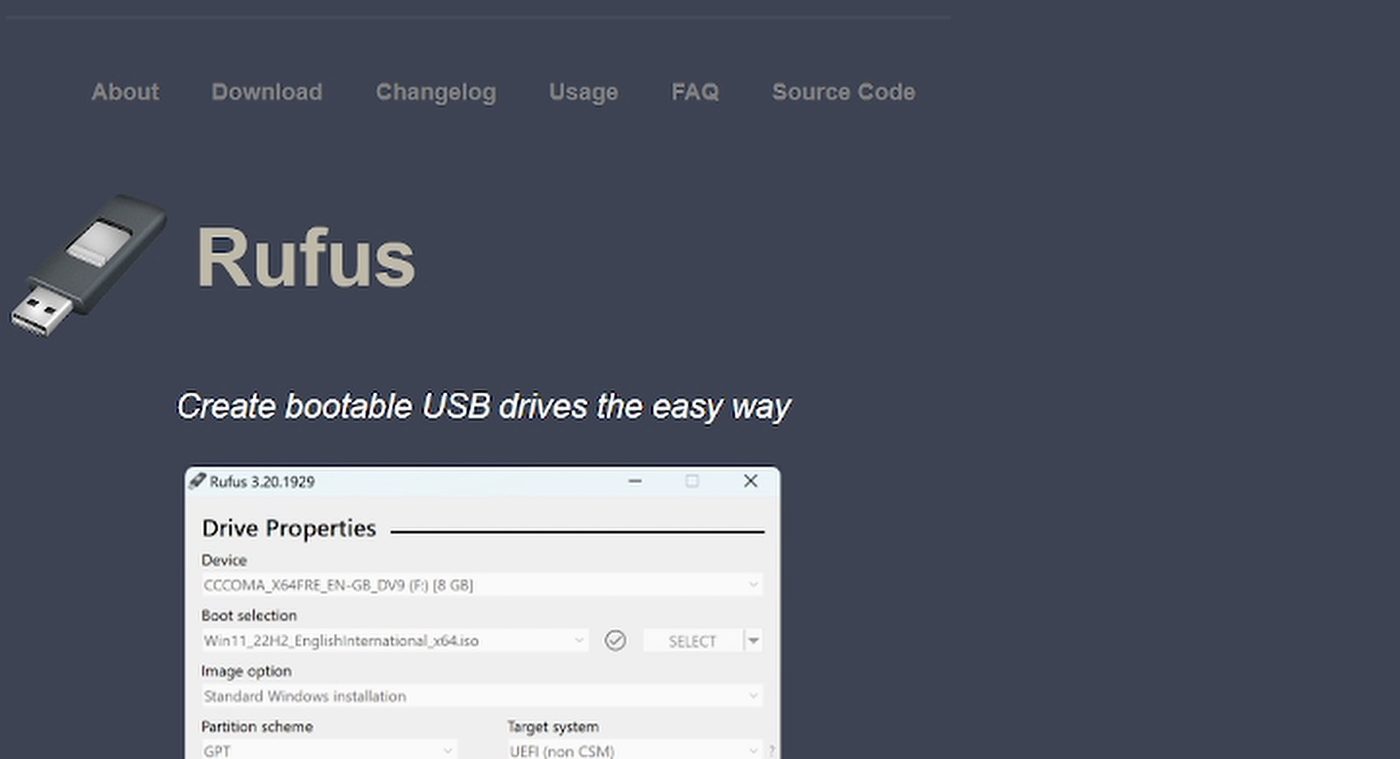
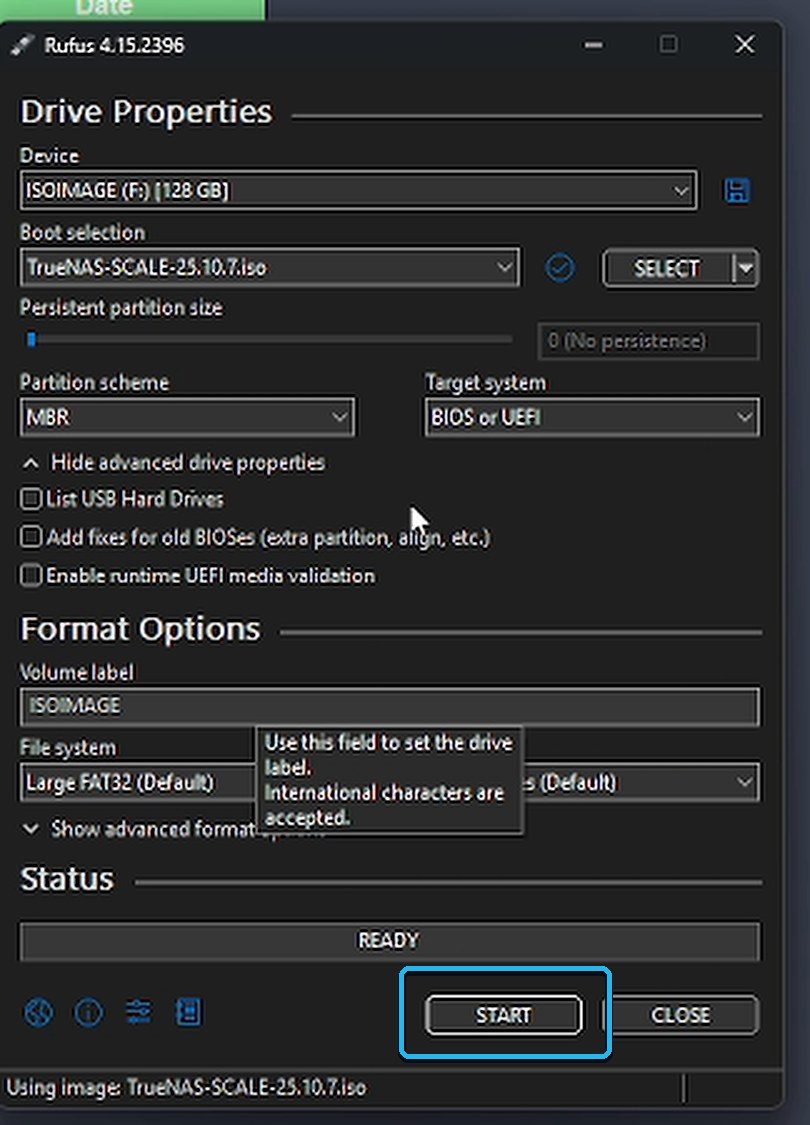
- Plug in the USB stick and open Rufus. Check that Device shows your USB stick.
- Under Boot selection, click SELECT and choose the TrueNAS .iso you downloaded.
- Leave every other setting as it is.
- Click START. If Rufus asks how to write the image, keep the recommended option and click OK.
- Confirm the warning that the USB stick will be wiped, then wait for the status bar to finish.
03Boot the old PC from the USB
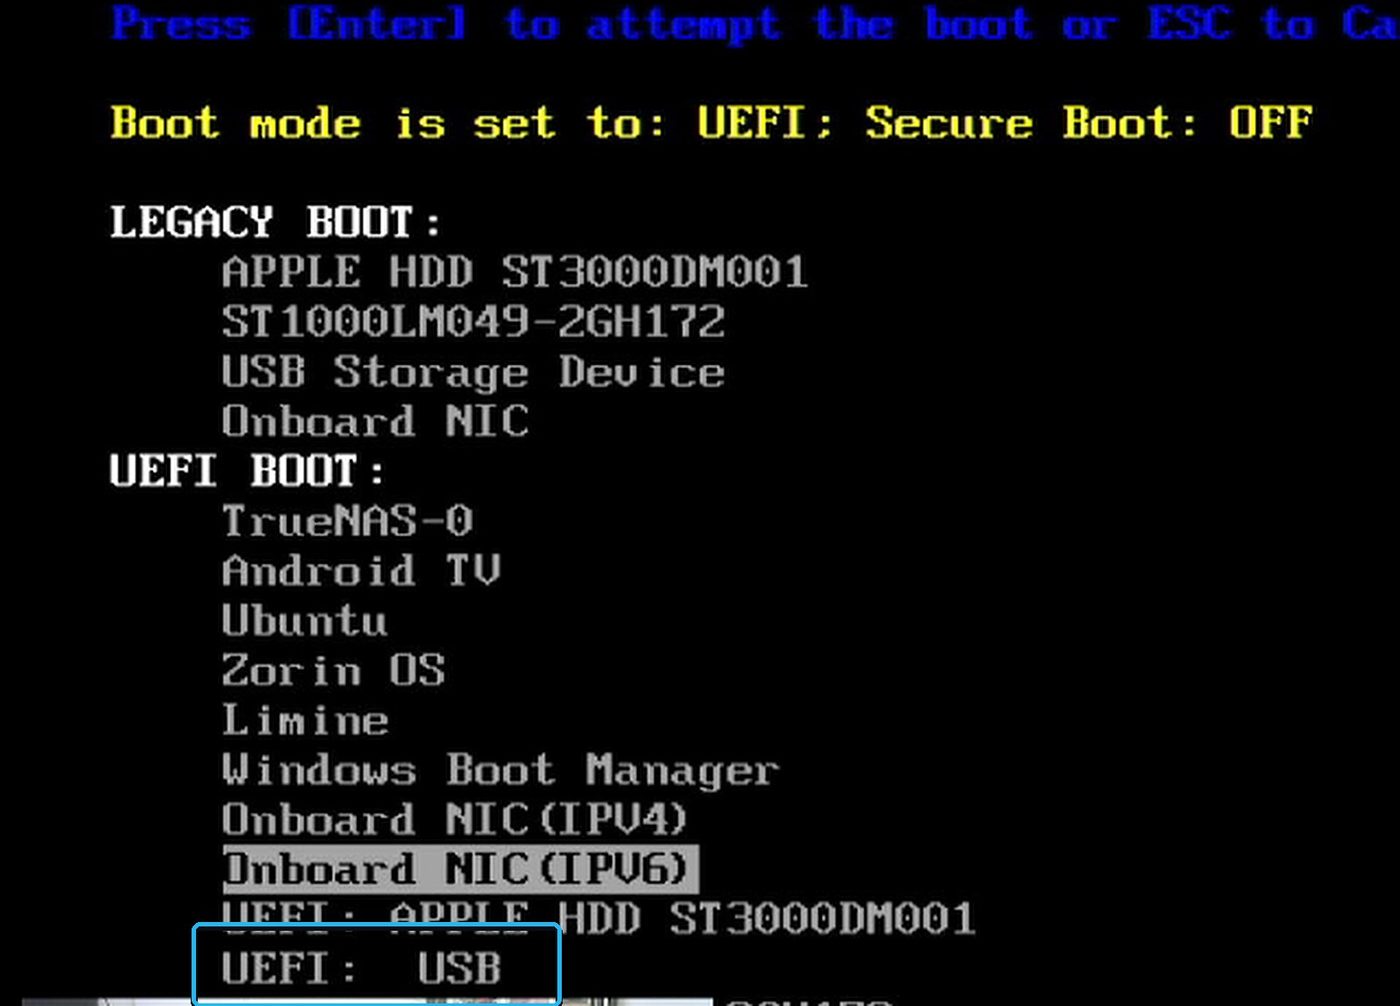
Plug the USB stick and the network cable into the old PC and turn it on. Tap the boot menu key straight away.
Arrow down to your USB stick and press Enter. In the video it's listed as UEFI: USB.
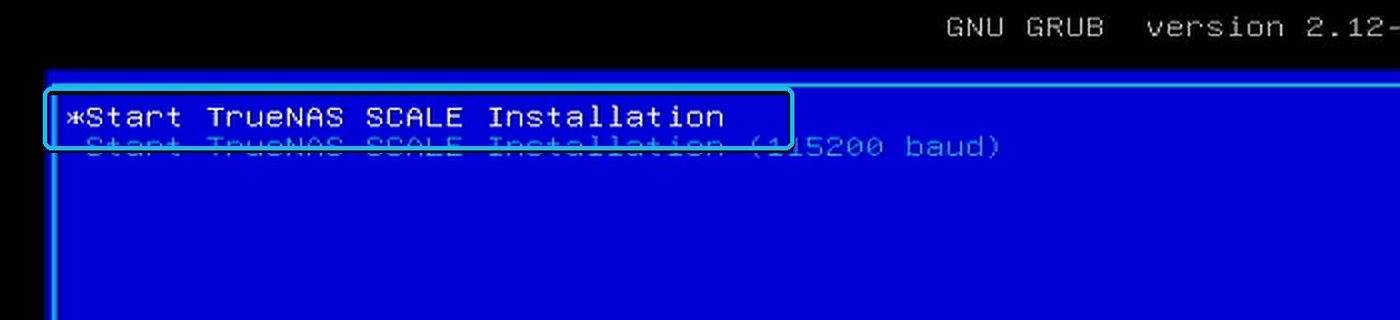
On the next screen, pick the top option, Start TrueNAS SCALE Installation.
04Install TrueNAS onto the boot drive
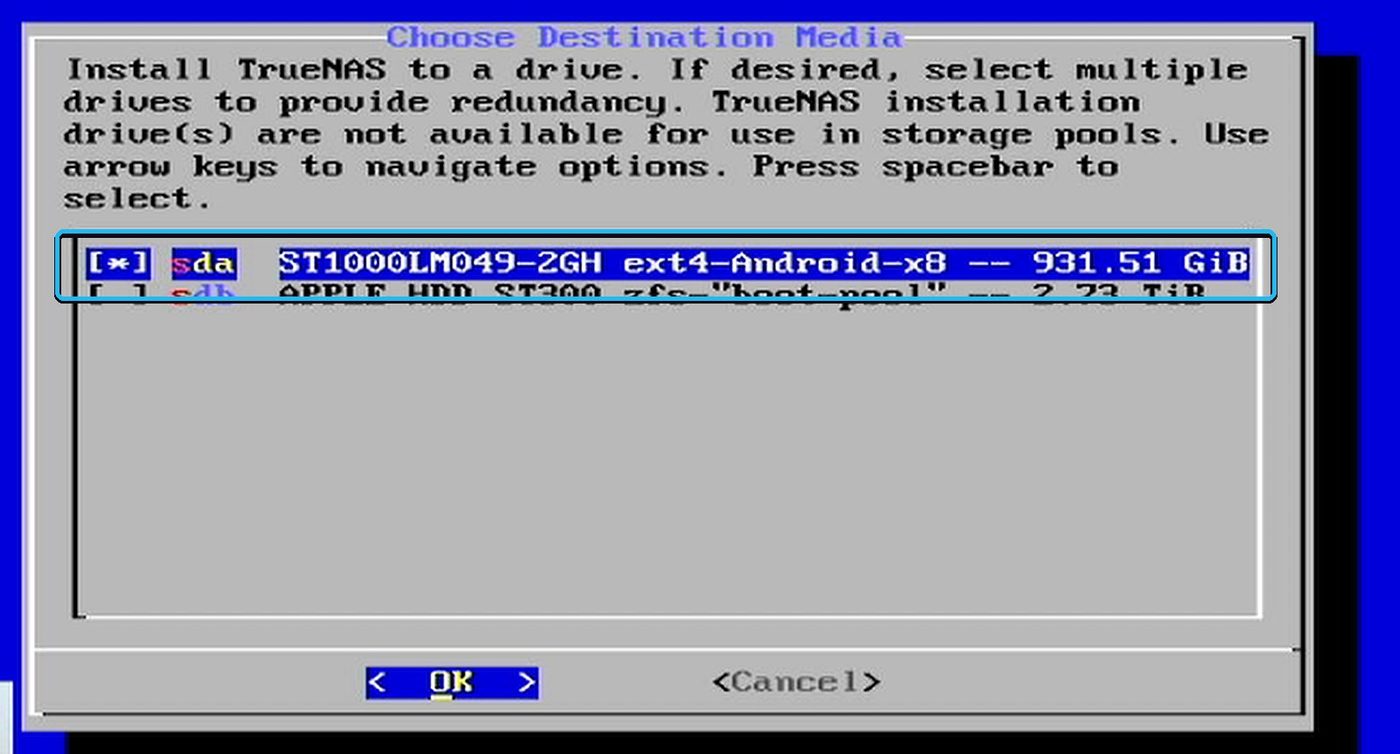
Go with the defaults on the installer menus. The one choice that really matters is which drive to install onto.
- Highlight your boot drive (the 1 TB drive in the video) and press the spacebar to select it, then OK.
- TrueNAS warns that it will erase that drive. Confirm.
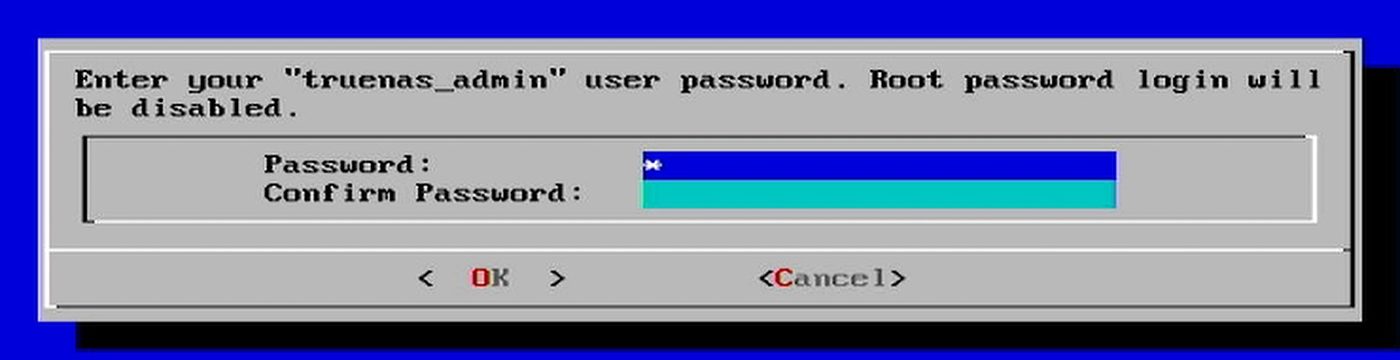
- Set a password for the truenas_admin user and confirm it. Write it down, because you need it to log in.
- Let it install. On older mechanical drives this takes a little while.
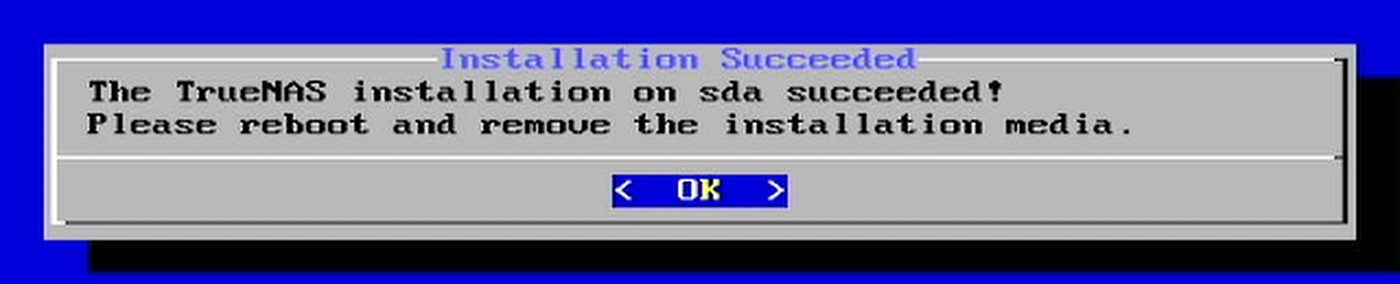
When it says Installation Succeeded, click OK, pull out the USB stick, and choose Reboot System.
05Find your NAS address and log in
Once it boots, the old PC shows a console screen. The line that matters is "The web user interface is at:". That's your NAS's address on your network.
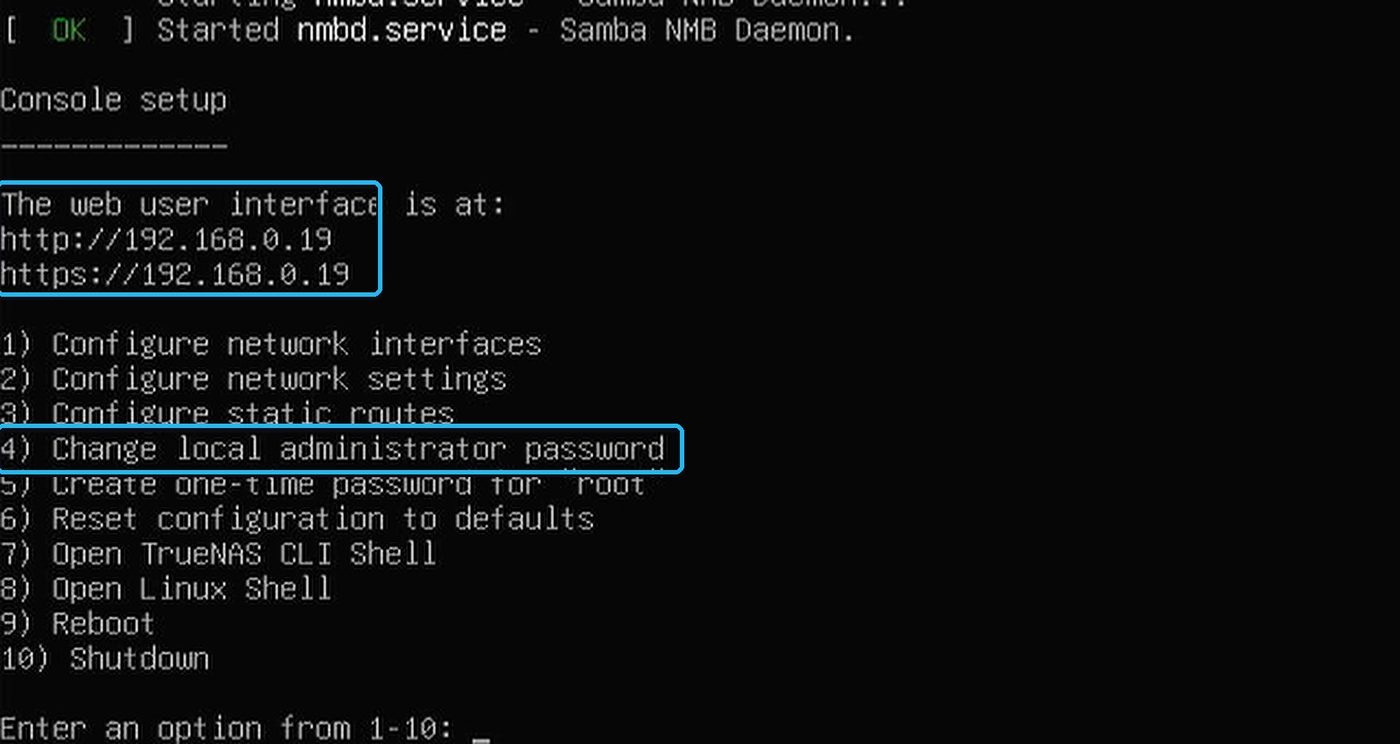
On your normal PC, type that address into a browser. Log in with username truenas_admin and the password you set during install.
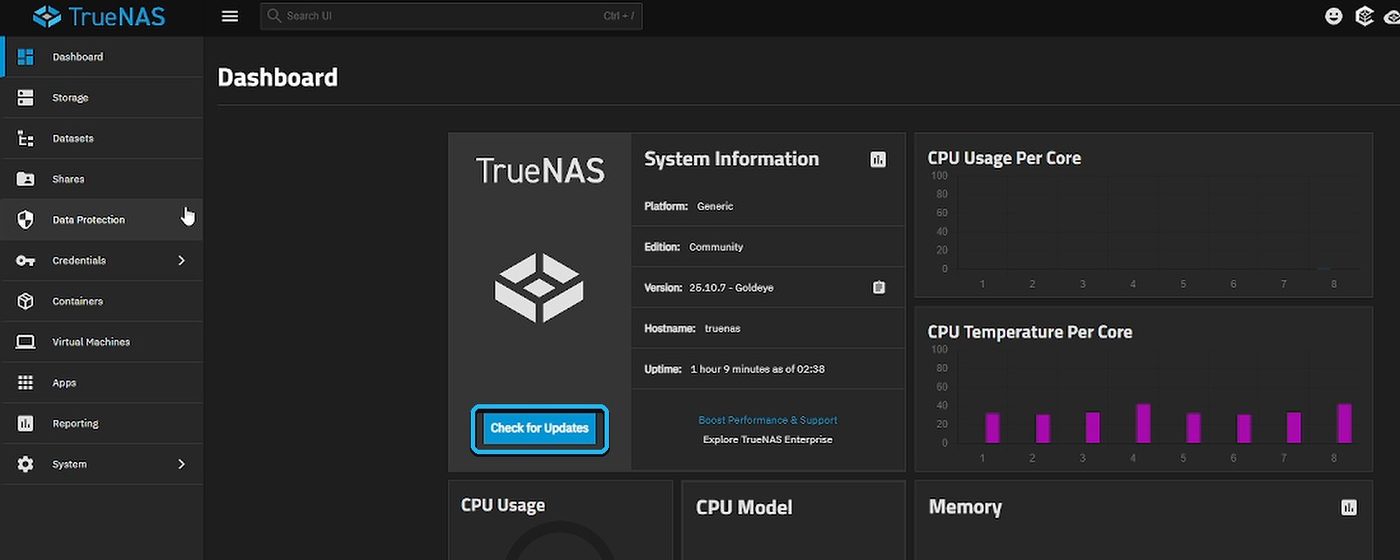
The first thing to do once you're in: click Check for Updates on the Dashboard. Do that every time you set up something new.
06Create a storage pool
A pool is the storage TrueNAS builds out of your data drive or drives. Go to Storage → Create Pool.
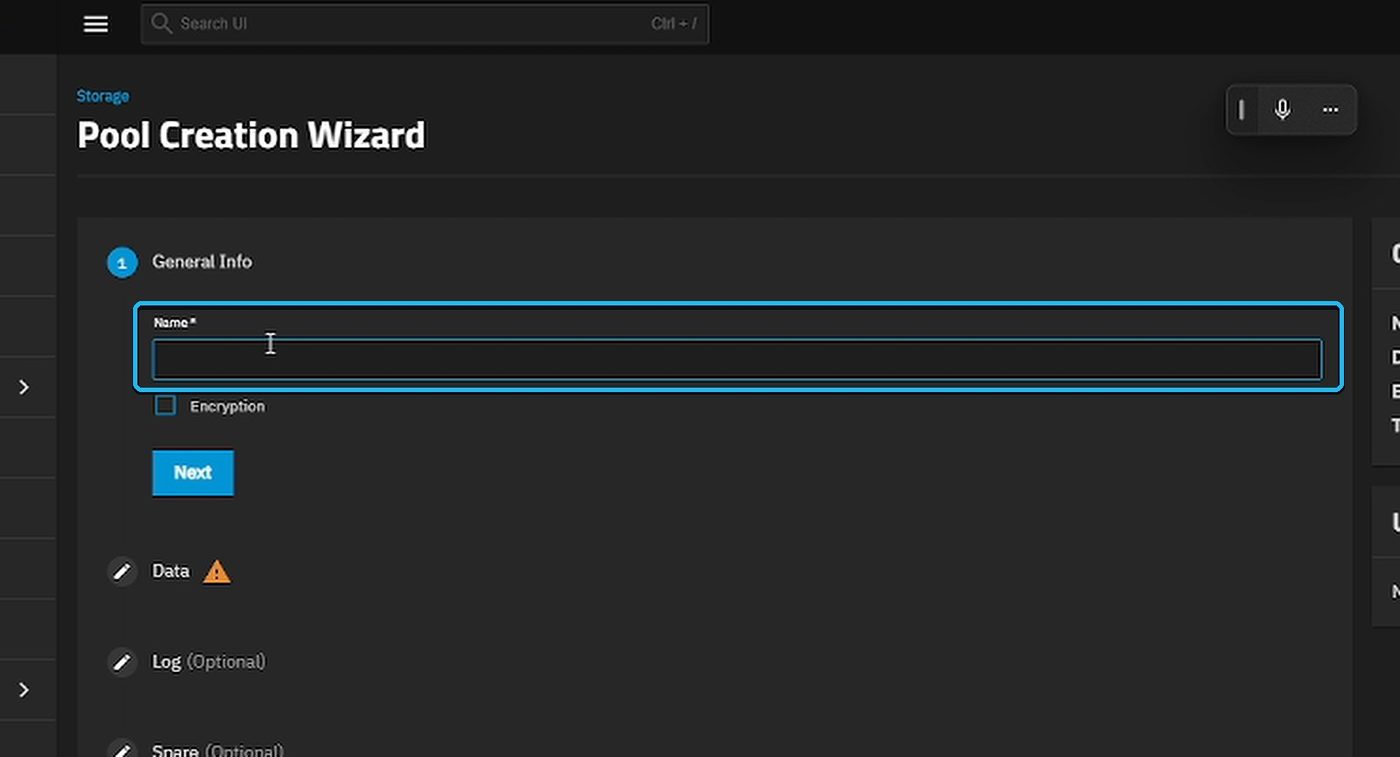
- Give the pool a name. The Name box is right at the top of the wizard and easy to miss. The video calls it data.
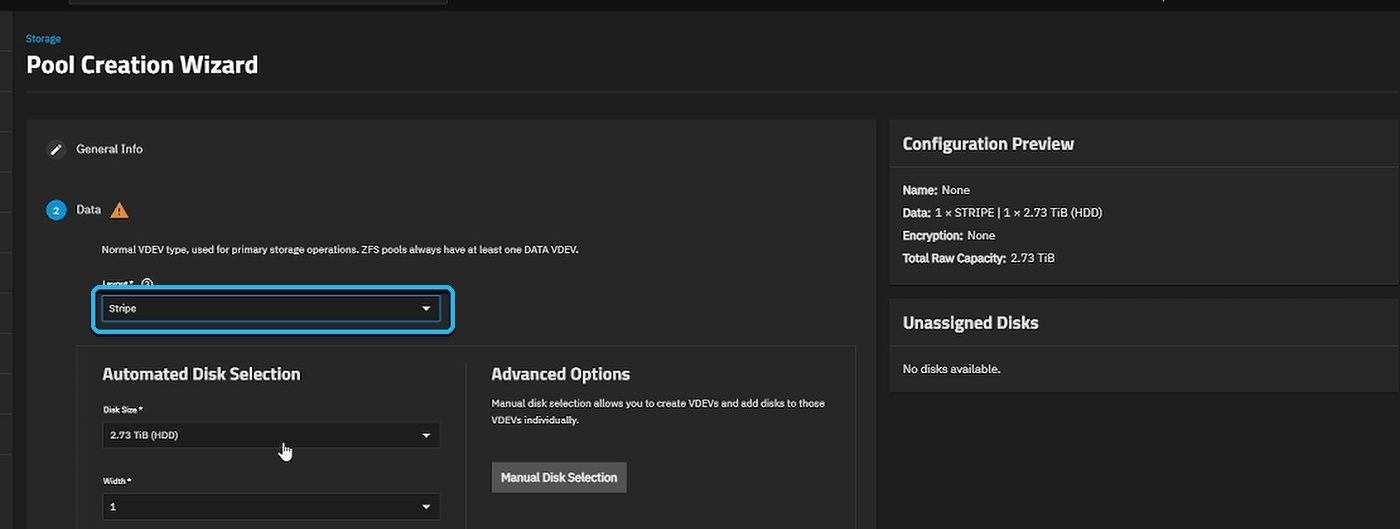
- Click Next. Under Layout, a single drive shows as Stripe. TrueNAS has already found the drive.
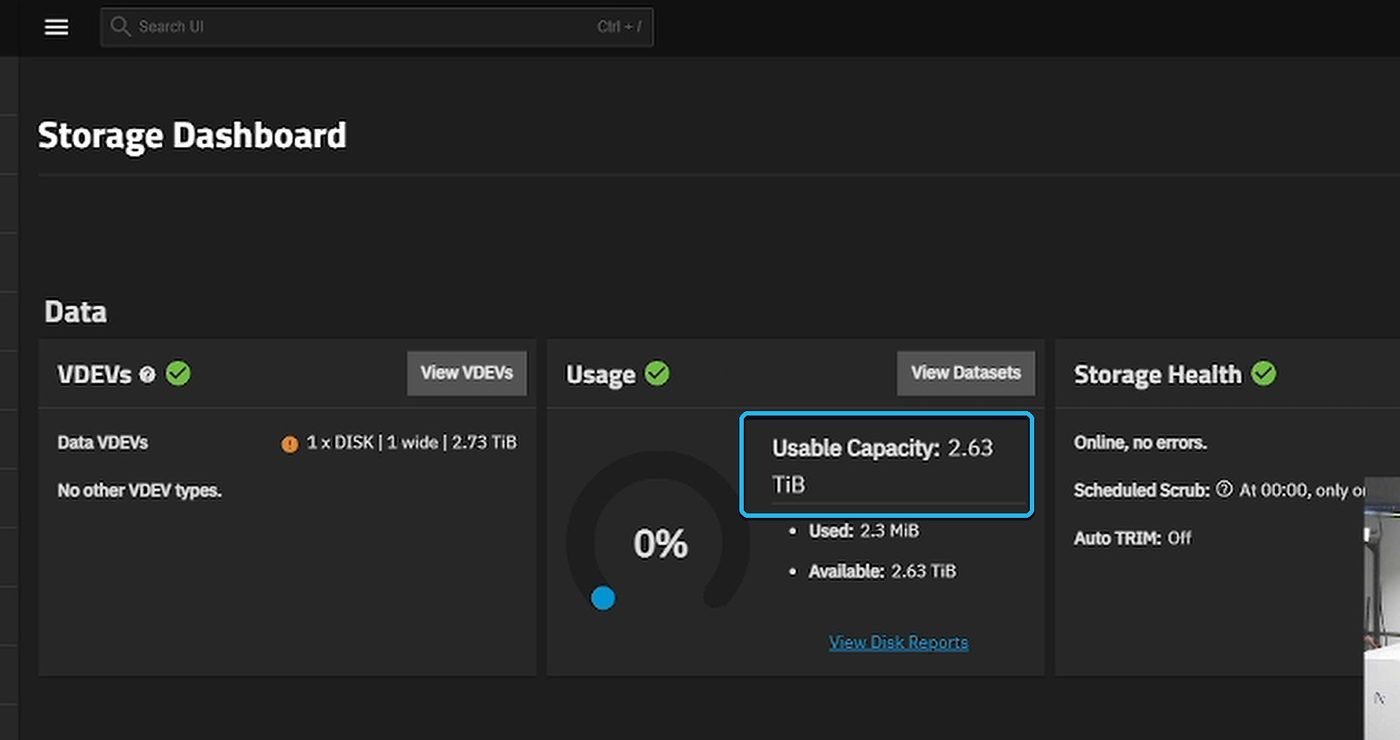
- Skip the optional sections, click Save And Go To Review, then Create Pool, tick Confirm and click Continue.
07Share it to your Windows PC
Now make a Windows (SMB) share so your PCs can open the storage like a folder.
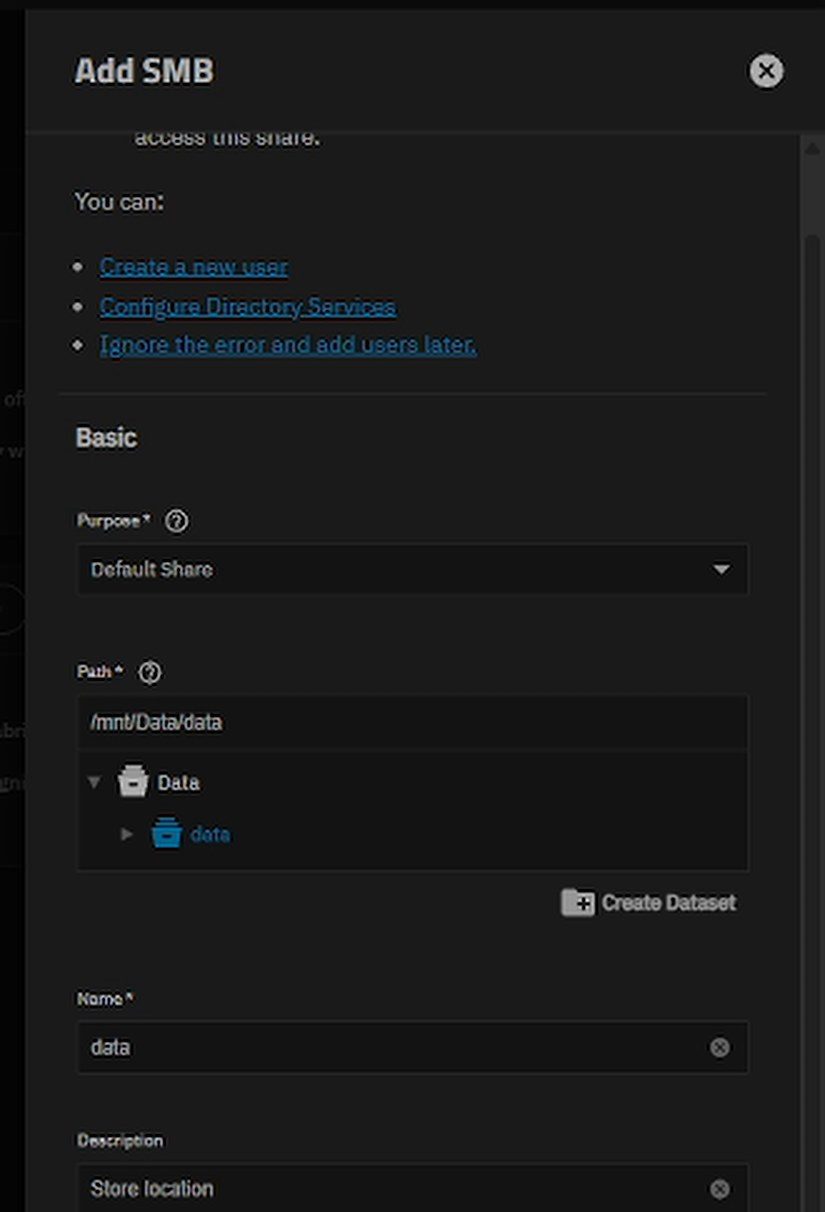
- Go to Shares. Next to Windows (SMB) Shares, click Add.
- Leave Purpose on Default Share.
- Under Path, click your pool, then Create Dataset, and call it data. A dataset is simply the folder where the share's files are stored. Using the same name everywhere keeps it easy to follow.
- Set Name to data and click Save.
08Create a user who can open the share
If you try the share now with the admin login, Windows says access denied. The share needs a user that has SMB access, and the admin account doesn't have it.
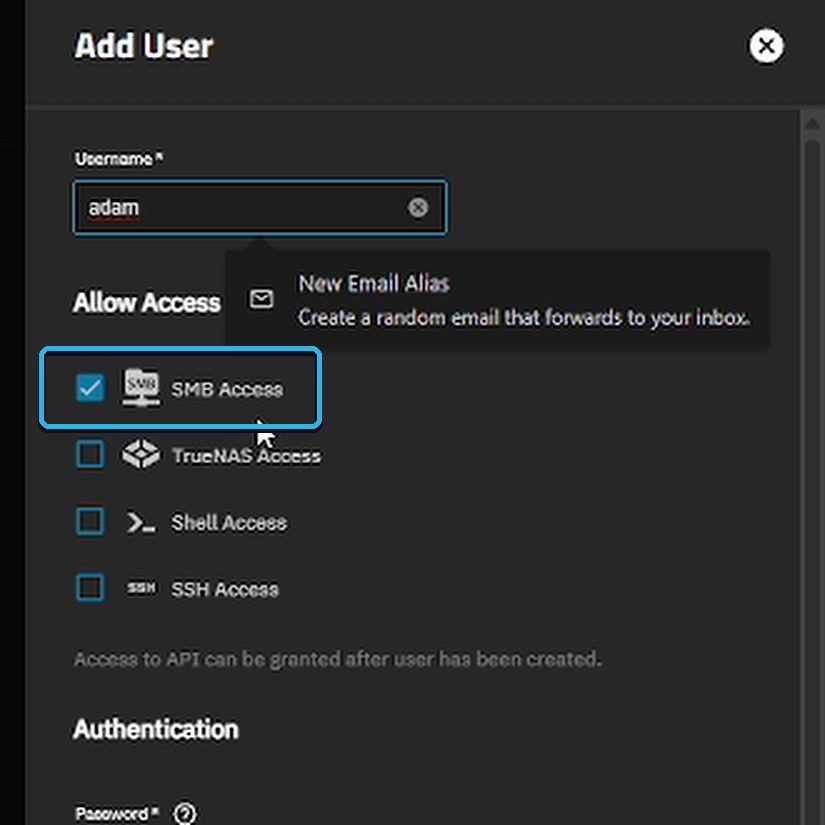
- Go to Credentials → Users → Add.
- Pick a username. The video uses adam.
- Under Allow Access, tick SMB Access.
- Set a password and click Save.
09Open your NAS from Windows
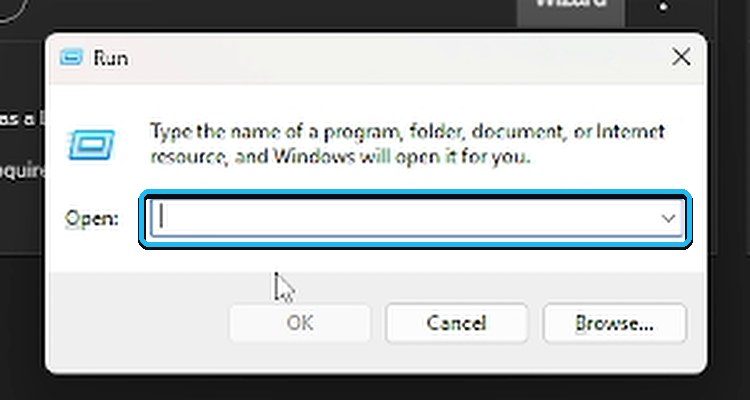
- Press Windows + R to open the Run box.
- Type two backslashes and your NAS address, for example \\192.168.0.19. Use your own address from the console screen.
- Press Enter and sign in with the user you just created.
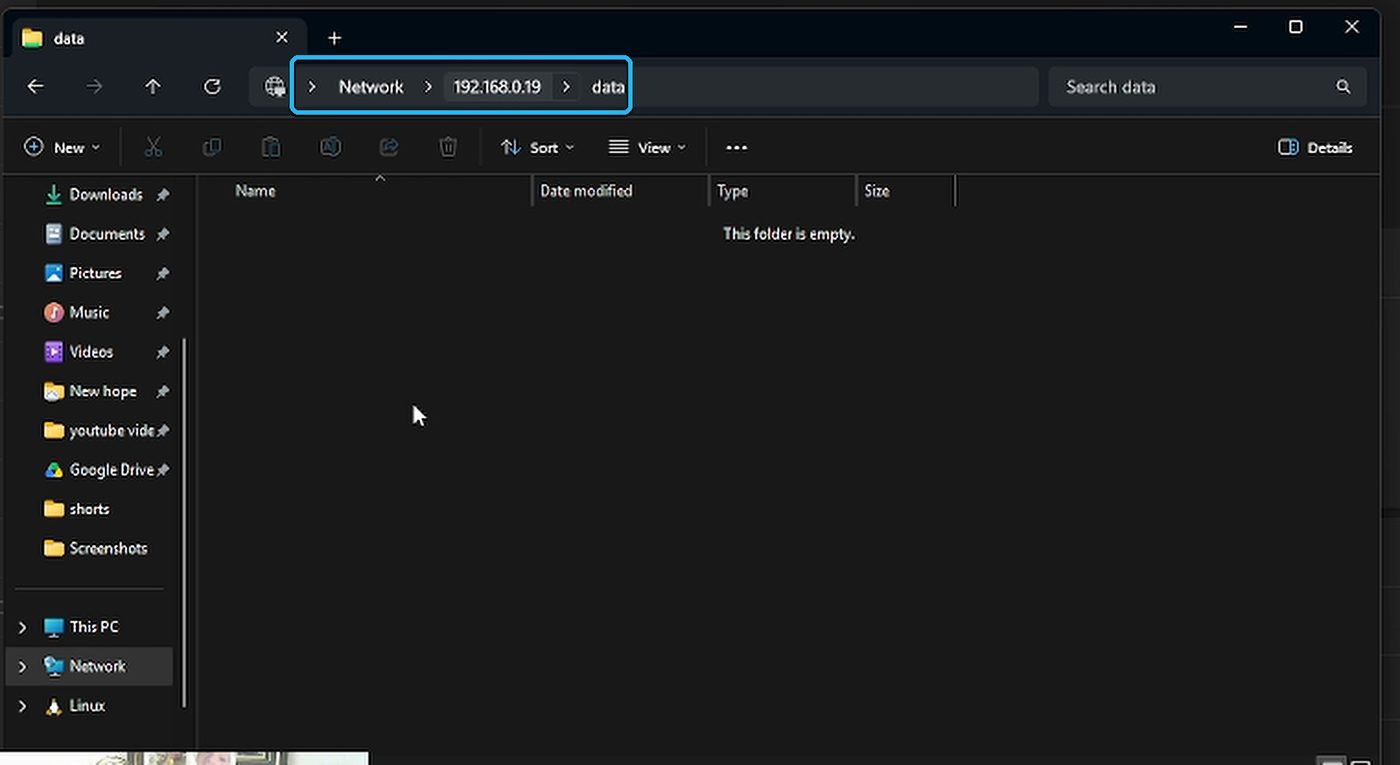
That's it. You've turned a derelict PC and some spare drives into network storage you can use every day.
10What else can it do?
A shared folder is just the start. In the left menu you'll find Apps, Containers and Virtual Machines. The app catalogue in the video lists 445 apps, including media servers like Jellyfin and Plex.
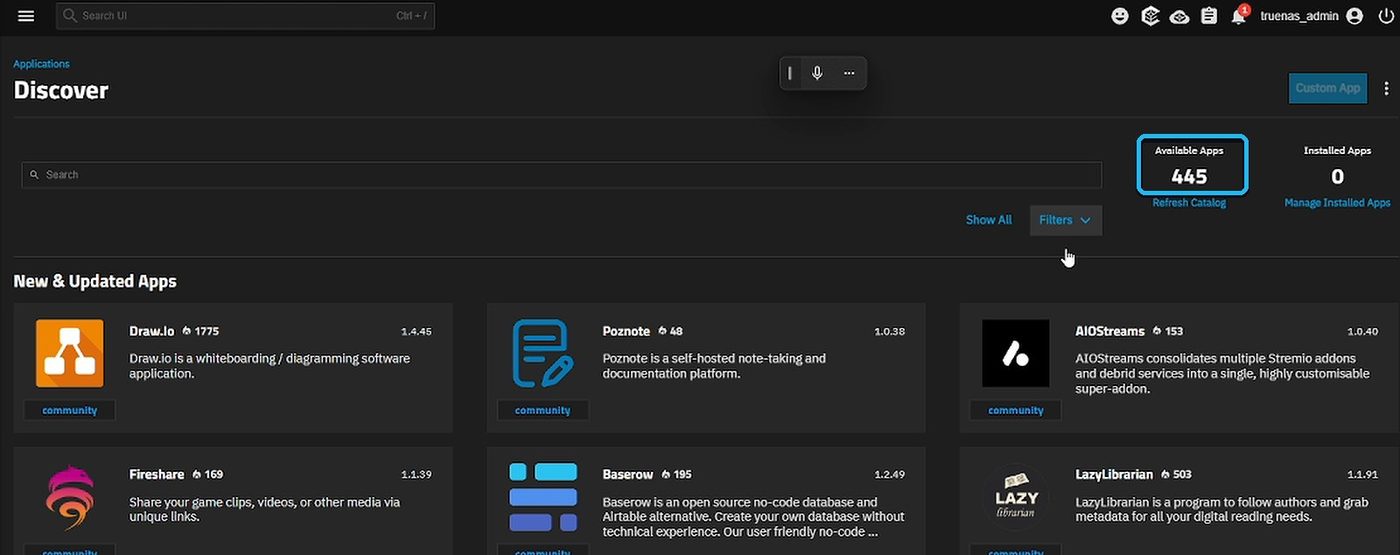
Part 2 of the series puts this same old PC to work with apps and a media server. Subscribe so you don't miss it.
?Troubleshooting
Can't get into the boot menu
Tap the key repeatedly as soon as you power on. Search "<model> USB boot" for your brand's key.
Create Pool won't go ahead
Scroll back to the top of the wizard and fill in the pool Name.
Wrong username or password in the browser
On the NAS console, use option 4 to set a new truenas_admin password.
Windows says access denied
Create a user with SMB Access ticked and sign in as that user, not the admin.
The address won't load
Check the network cable on the NAS, and make sure both PCs are on the same home network.
Rather have it set up for you?
AYVAtech does home and small business IT across Penrith & Western Sydney.
Screenshots are from the build in the video (TrueNAS Community Edition 25.10.7). Menus can move between versions, and your NAS address will be different. Back up anything important before wiping a drive.